SciFigureAI logoSciFigureAI
  • Home
  • PaperBanana
  • Pricing
  • Get Started
SciFigureAI logoSciFigureAI

Create scientific figure drafts from text, then iterate with credits that fit your research workflow.

GitHubYouTube
Featured on There's An AI For ThatStripe Climate member
Product
  • Text to Figure
  • PaperBanana
  • Sketch to Figure
  • Edit Image
  • PPTX / SVG Export
  • Pricing
Resources
  • Inspiration
  • Tutorials
  • Pricing
  • Start Creating
Company
  • Contact
Legal
  • Cookie Policy
  • Privacy Policy
  • Terms of Service
© 2026 SciFigureAI. All Rights Reserved.
SciFigureAI Tutorials

SciFigureAI Tutorials for scientific figure workflows

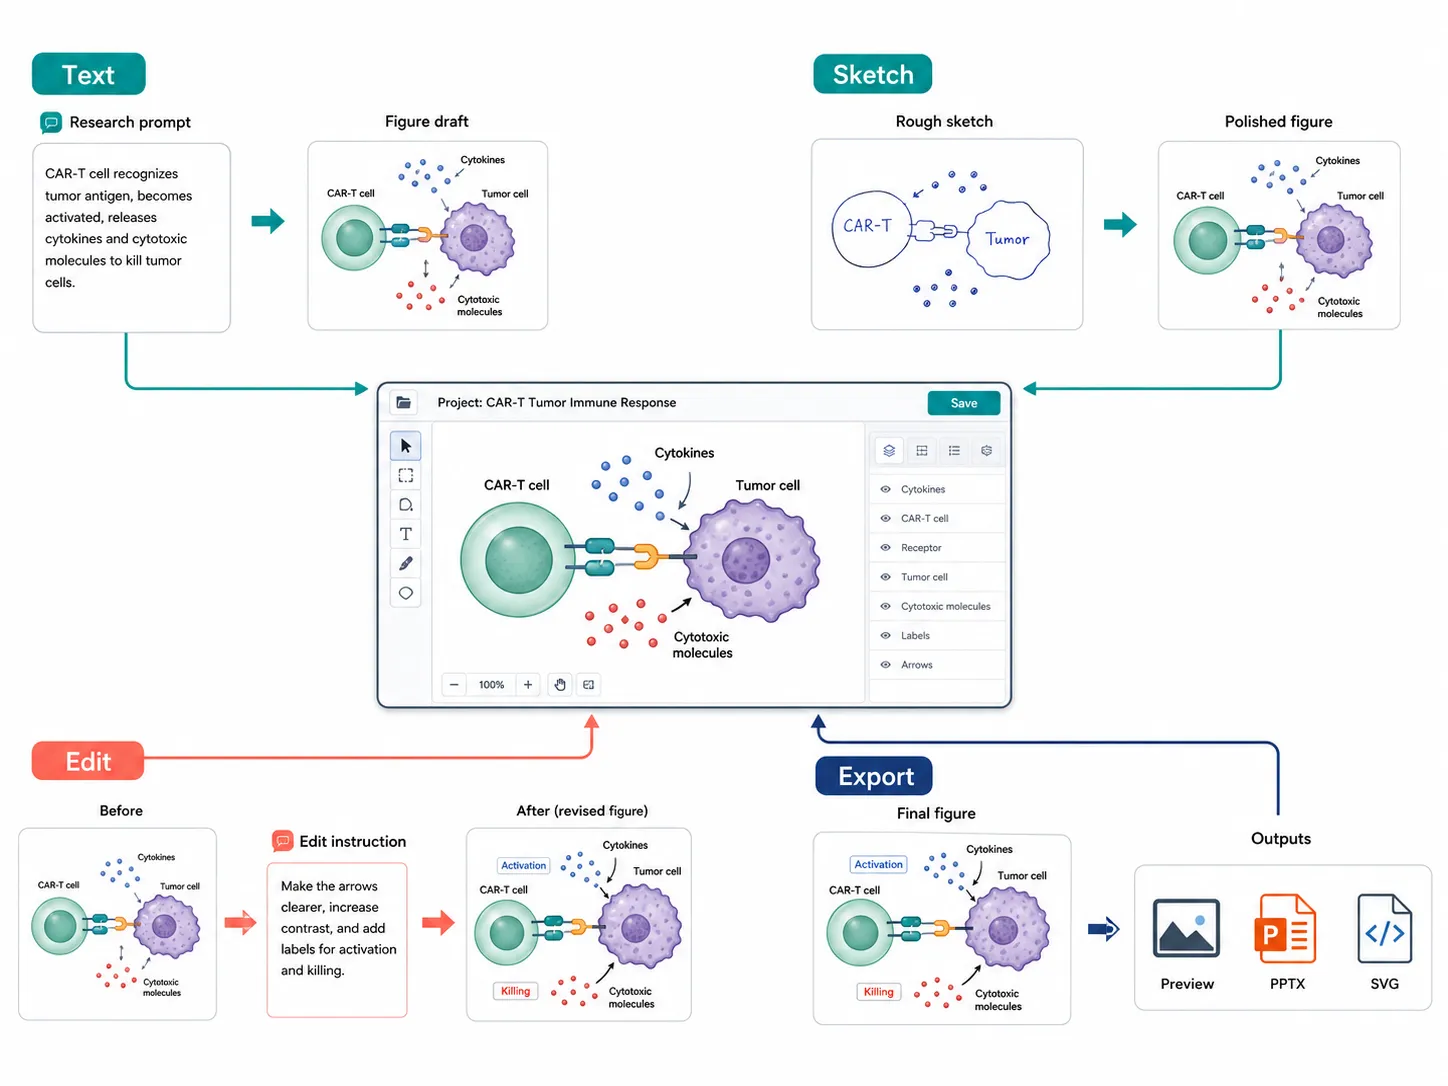
Use SciFigureAI Tutorials to learn the complete workflow for creating scientific figure drafts: start from text, guide generation with a sketch, edit an image, and export the final result for review or slides.
Start Creating a FigureBrowse Inspiration
SciFigureAI Tutorials overview showing Text, Sketch, Edit, and Export scientific figure workflows

Four tutorials in one project workflow

SciFigureAI Tutorials

Product intro video

See the SciFigureAI workflow before you start

Watch how a research prompt, abstract, sketch, or existing image becomes a reviewable scientific figure draft that you can refine, preview, and export.

Create Your First Figure

See the SciFigureAI workflow before you start

20-30 second product intro

What the SciFigureAI Tutorials cover

These SciFigureAI Tutorials explain the four modes in the workspace and when to use each one. Start with the tutorial that matches your input: a research description, a rough sketch, an existing figure draft, or a saved image ready for export.

Text to Figure tutorial

Create a figure from a research description

Sketch to Figure tutorial

Turn a rough sketch into a cleaner visual draft

Edit Image tutorial

Revise a generated or uploaded image

Scientific Figure Export tutorial

Download previews or export PPTX / SVG files

Text to Figure tutorial

Create a figure from a research description

This Text to Figure tutorial is the best starting point when you know the scientific story but do not have a visual layout yet. Write the mechanism, workflow, or abstract as a focused visual brief.
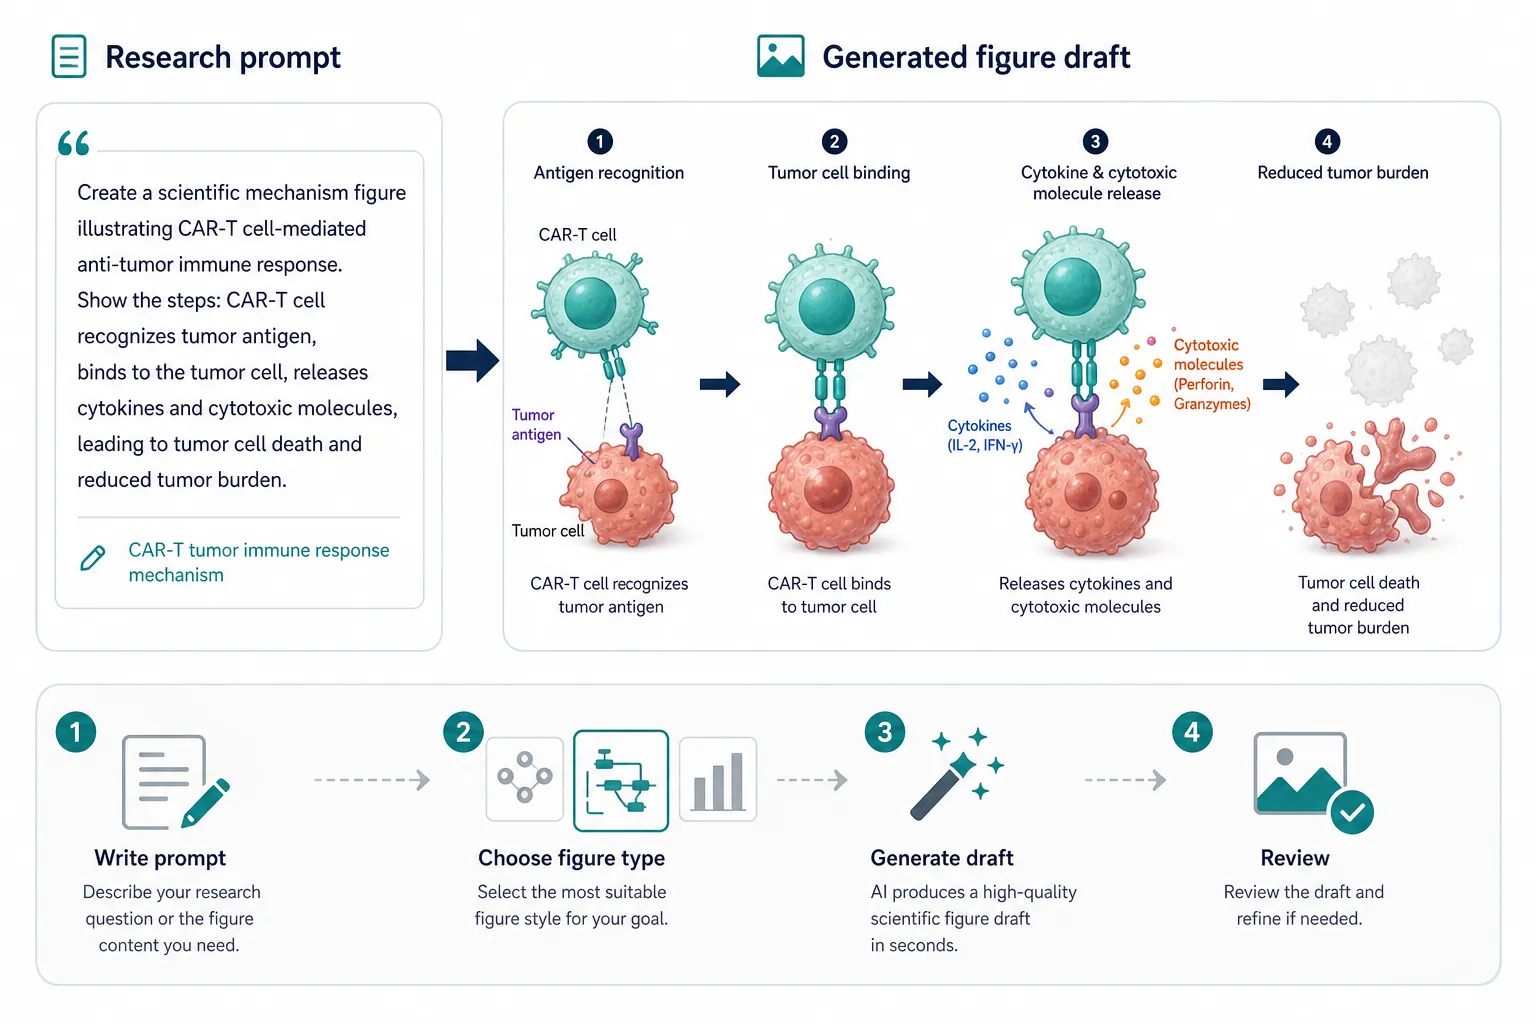
Text to Figure tutorial showing a research prompt converted into a CAR-T scientific figure draft

Research prompt to generated draft

Text to Figure tutorial

Prepare this input
  • A short abstract, mechanism summary, or research brief
  • The intended figure type, such as graphical abstract or mechanism diagram
  • Key entities, process order, scientific field, and label density
Steps
  1. Open the workspace and choose Text mode.
  2. Paste a concise research description into the prompt field.
  3. Choose figure type, research field, aspect ratio, and resolution.
  4. Generate the draft, then review labels and scientific relationships before using it.
Output

The output is a new generated image saved to the project conversation, ready for review or follow-up editing.

Notes
  • Short visual briefs usually work better than long unfocused abstracts.
  • Name the subject, process order, and expected label density in the prompt.
Start with Text
Sketch to Figure tutorial

Turn a rough sketch into a cleaner visual draft

This Sketch to Figure tutorial is useful when you already know the layout. Upload a rough drawing, then add research context so the generated figure follows the intended structure.
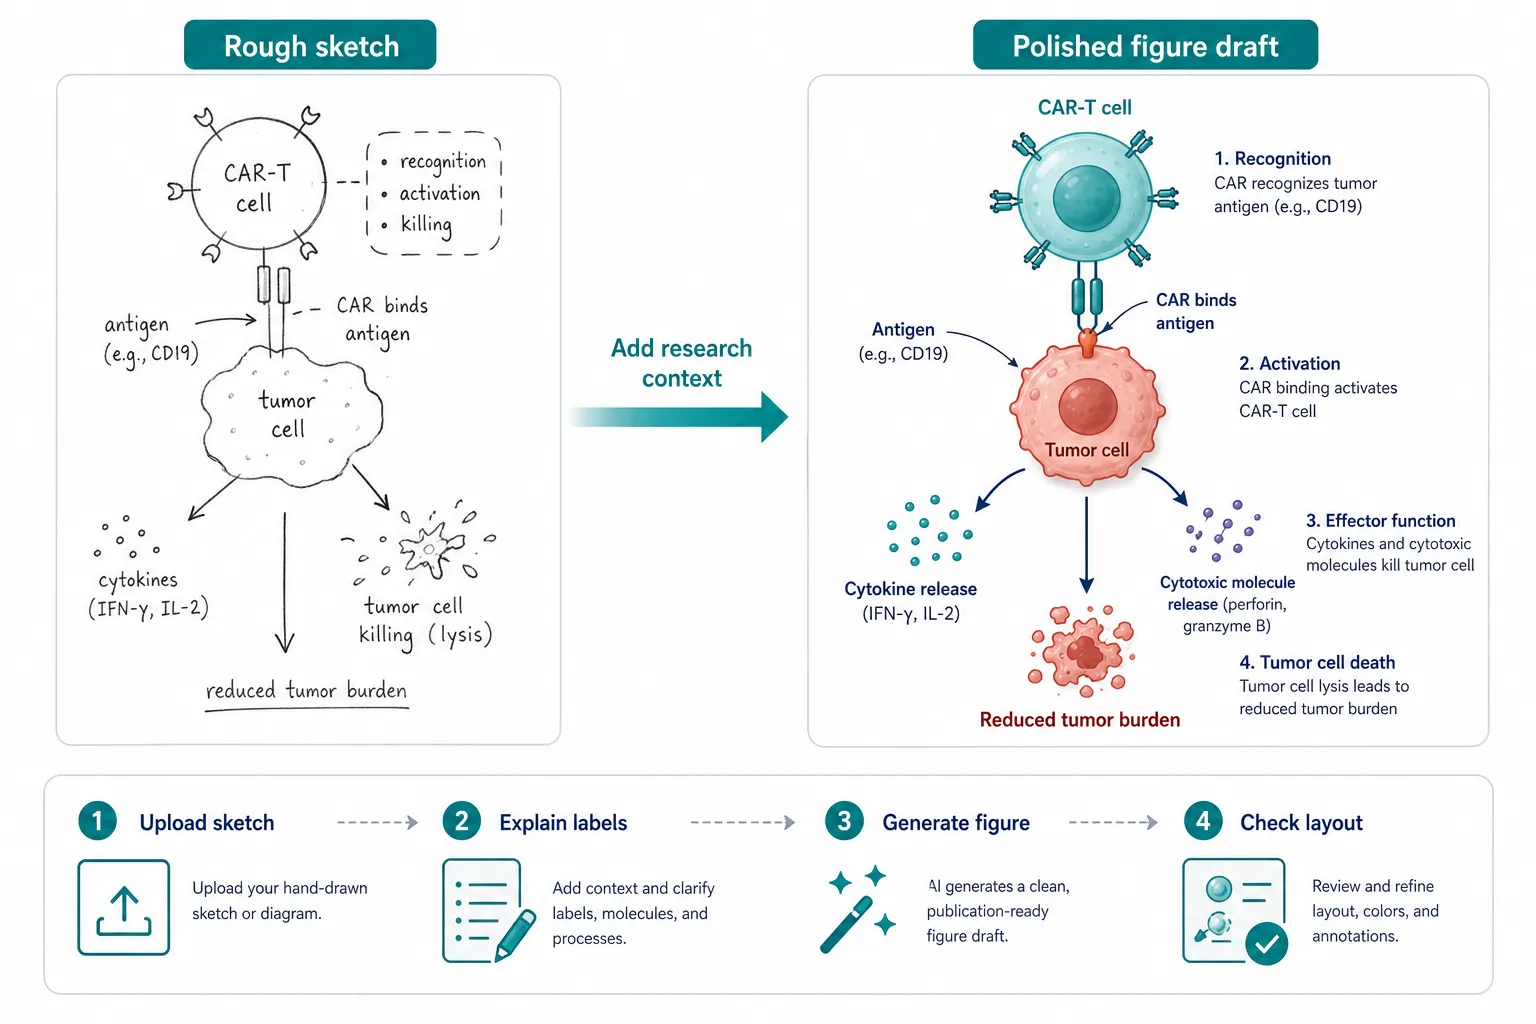
Sketch to Figure tutorial showing a rough CAR-T sketch converted into a polished scientific figure draft

Sketch-guided generation

Sketch to Figure tutorial

Prepare this input
  • A simple sketch, whiteboard photo, or low-fidelity layout
  • Research context that explains what each region should represent
  • A target figure type and the expected level of detail
Steps
  1. Choose Sketch mode and upload the source image.
  2. Describe the scientific content and the intended visual style.
  3. Generate a new draft guided by the sketch and text.
  4. Inspect whether the layout, labels, and visual emphasis match your intent.
Output

The output is a generated scientific figure draft guided by the uploaded source and your research context.

Notes
  • Clear sketches with fewer tiny labels are easier to transform.
  • Describe ambiguous shapes, arrows, panels, and biological relationships.
Start with a Sketch
Edit Image tutorial

Revise a generated or uploaded image

This Edit Image tutorial helps when the image is close, but composition, labels, arrows, or focus still need adjustment. Keep the scientific meaning stable while requesting a clearer version.
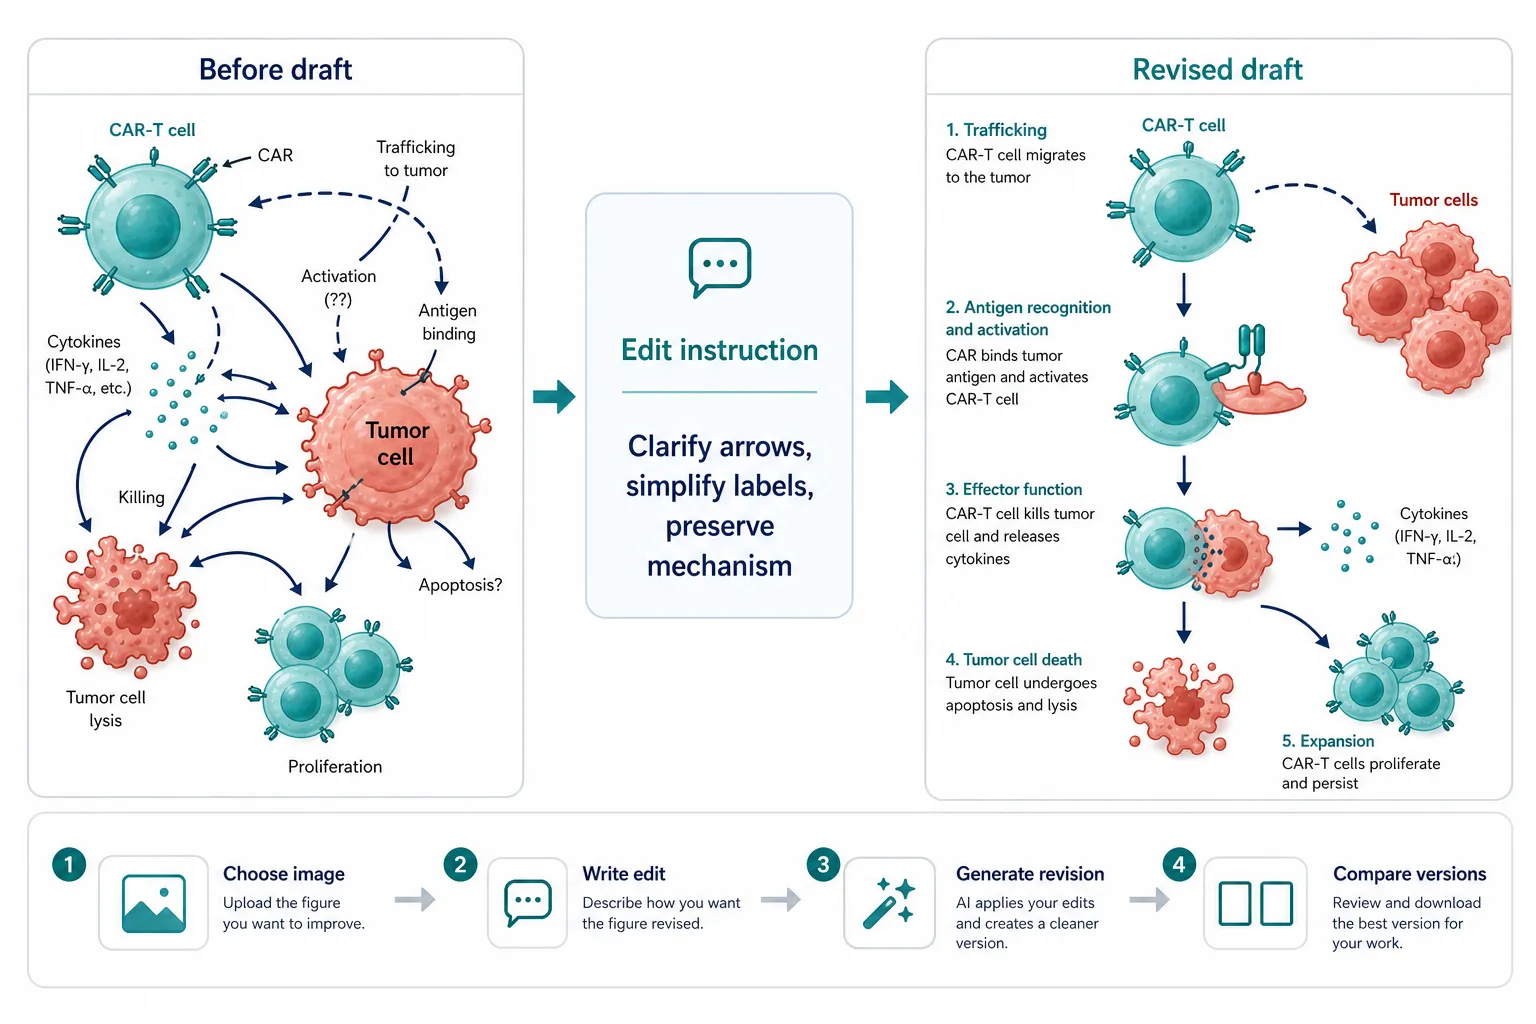
Edit Image tutorial showing a scientific figure draft revised with text instructions

Text-guided image revision

Edit Image tutorial

Prepare this input
  • A selected generated image or an uploaded external image
  • A short edit instruction that says what should change
  • Any cells, labels, relationships, or layout features that should stay stable
Steps
  1. Select an image from the conversation or choose Edit mode for an uploaded image.
  2. Write a concise edit request in the composer.
  3. Generate the revised version.
  4. Compare versions and continue iterating if needed.
Output

The output is a new image version saved in the same project, with earlier versions still available.

Notes
  • Edit requests work best when they are specific and limited.
  • Say what should change and what should remain scientifically unchanged.
Start Editing
Scientific Figure Export tutorial

Download previews or export PPTX / SVG files

This Scientific Figure Export tutorial is the final handoff step. Use it after a generated image is ready enough for quick sharing, slide review, or downstream editing.
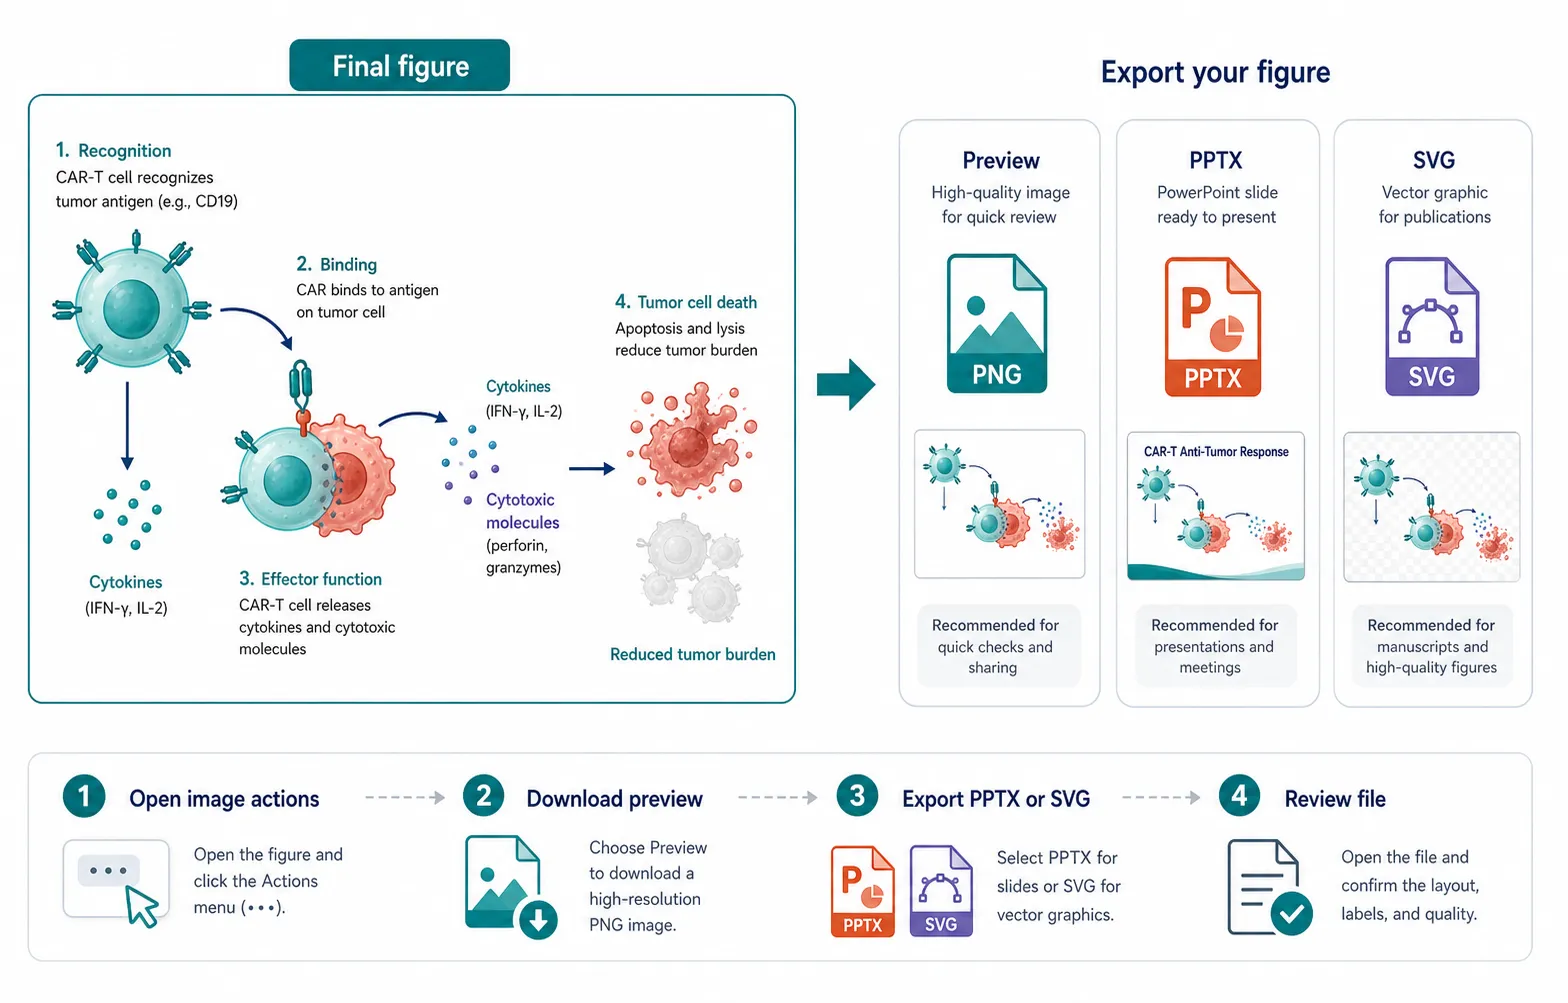
Scientific Figure Export tutorial showing preview, PPTX, and SVG outputs for a generated figure

Preview, PPTX, and SVG export

Scientific Figure Export tutorial

Prepare this input
  • A saved generated image inside a project
  • A decision between quick preview download and export file creation
  • A final review of scientific details and embedded labels
Steps
  1. Open the generated image actions.
  2. Download the preview for quick review if that is enough.
  3. Choose PPTX or SVG when you need a presentation or editing file.
  4. Review the exported file before placing it into formal materials.
Output

The output is a free preview download, or a created PPTX / SVG file for handoff.

Notes
  • Download preview is free.
  • PPTX export is useful for presentations and collaborator review.
Create an Exportable Figure
FAQ

SciFigureAI Tutorials questions

Use these answers to choose the right scientific figure tutorial before you generate, revise, or export a draft.

What are SciFigureAI Tutorials?

SciFigureAI Tutorials are workflow guides for creating scientific figure drafts with Text, Sketch, Edit, and Export modes.

Which tutorial should I start with?

Start with Text if you only have a written idea, Sketch if you have a layout, Edit if you have a draft, and Export when the figure is ready.

Do these scientific figure tutorials replace review?

No. Each tutorial helps create a clearer draft, but researchers still need to review labels, mechanisms, scale, and domain accuracy.

Can I use one project across all tutorials?

Yes. One SciFigureAI project can hold generated drafts, sketch-guided versions, image edits, preview downloads, and PPTX or SVG exports.

What inputs make the tutorials work best?

Focused inputs work best: a concise prompt, a clean sketch, a specific edit request, or a saved figure ready for export.

Are the tutorials only for biology figures?

No. The examples use biomedical mechanisms, but the workflow also fits graphical abstracts, protocols, chemistry schemes, and materials figures.

Use SciFigureAI Tutorials with your own research topic

Choose the workflow that matches your starting point, create a scientific figure draft, revise it with focused instructions, and export the result when it is ready for review.

Open the Workspace